Last Updated on November 1, 2025 by Kevin Collier
Top Takeaways and Key Concepts
- Choose a Cool, Shaded Location: Select a north-facing slope or shaded area to minimize sunlight exposure.
- Dig Below the Frost Line: Ensure the cellar is deep enough to avoid freezing temperatures.
- Use Natural Insulating Materials: Incorporate earth, straw, or hay to maintain stable temperatures.
- Provide Proper Ventilation: Install vents to allow airflow and reduce humidity buildup.
- Build with Durable Materials: Use stone, brick, or concrete blocks for structural integrity.
So… you wake up one day, and the grocery store feels like it’s been hit by a tornado. Empty shelves stare back at you, and your fridge? Well, it’s practically begging for a snack. What now?
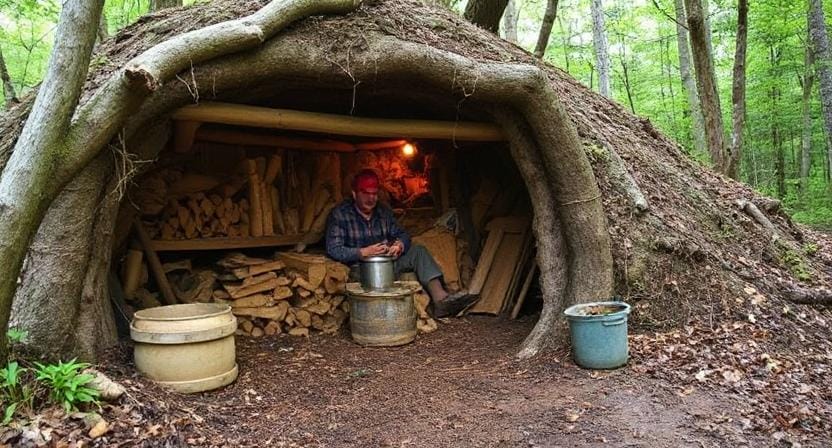
If you’ve got a root cellar, you’re in luck! Picture it as your secret food hideout. A place where you can channel your inner pioneer. Just think about it: fresh, homegrown veggies waiting for you. Delicious potatoes, crisp carrots, all cozy in their chilly home. Sounds good, right?
Please Note: This post may contain affiliate links. If you click one of them, we may receive a commission at no extra cost to you. As an Amazon Associate, I earn from qualifying purchases.
Building a root cellar doesn’t have to be super complicated. Find a shady spot in your yard—maybe near some trees. It needs to be cool and dark. Digging can be a workout, but it’s kind of fun, like a treasure hunt. Plus, fresh veggies sound like a great reward!
When you’ve got your hole, line it with some boards or stones. This helps keep the dirt out. It’ll feel like a little cave. Air circulation is key. Leave a small opening—it helps keep things fresh and prevents mold. You want your veggies to be happy!
Storing them right is a big deal. Make sure they’re clean and dry before putting them in. Label your stash so you know what’s there. You wouldn’t want to forget those delicious beets hiding away!

Oh, and remember to check on them occasionally. It’s like visiting friends. Some might need to be eaten first. It’s all about using what you’ve got.
A cozy root cellar gives you peace of mind. You’ll feel like a real survivalist. The best part? Homemade meals, even when the stores are bare. So, dig in, have fun, and know you’re all set for whatever comes your way! 🥔🥕🌱
Why You Need a Root Cellar
*** Shop for Survival Gear - Tools - Kits ***
Survival Gear - Bags and Backpacks - Knives - Boots/Footwear - Communication
Outdoor Cooking - Gloves - Hydration - Dry Boxes - Water Filtration Systems
Tents - Sleeping Bags - First Aid Kits - Multi-Tools - Flashlights - Fire Starters
Navigation - Survival Food - Night Vision - Headlamps - Stun Guns - Binoculars
First, let's speak about why someone would want a root cellar in the first place. It sounds like something from Little House on the Prairie, doesn't it? But listen to me! An underground storage chamber called a root cellar is used to keep fruits and vegetables fresh long after they have been picked. It's like giving your fruits and vegetables their own spa retreat—dark, chilly, and comfy!
Most root cellars, on the other hand, keep their temperatures between 32°F and 40°F, which is barely over freezing but not quite beach weather. This temperature range keeps the carrots fresh and tasty while slowing down deterioration.
Also, you'll be ready for the end of the world (or just another pandemic) with a stockpile of things that any survivalist would be proud of.
Let's be honest: we all have that one friend who says they can live on nothing but canned beans and instant ramen. But wouldn't it be great to bring them fresh herbs or luscious apples when they come to your door asking for food?
Finding the Right Place
Now that we know how great it is to have our own veggie vault, where should we keep it? If you can, find a shady area outside, preferably near your garden so you can quickly get those wonderful vegetables from the ground to storage without losing them along the way (believe me, I've lost a lot of tomatoes in my day).
Also, think about how water will flow. If you don't plan on having fish parties, you don't want to make an indoor pool. Find high ground or places where water naturally flows away from where you want to build your cellar. If water collects in the region during severe rainstorms, find another place before you develop into a sponge the size of a person.
When it comes to location, make sure you can get there all year. Being knee-deep in snow in the winter while trying to get to your beloved potatoes and wondering why you didn't think this through more carefully is the worst thing that can happen.
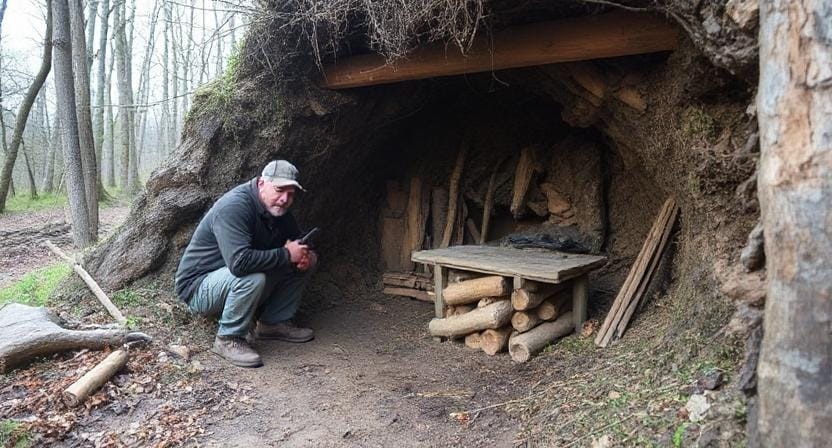
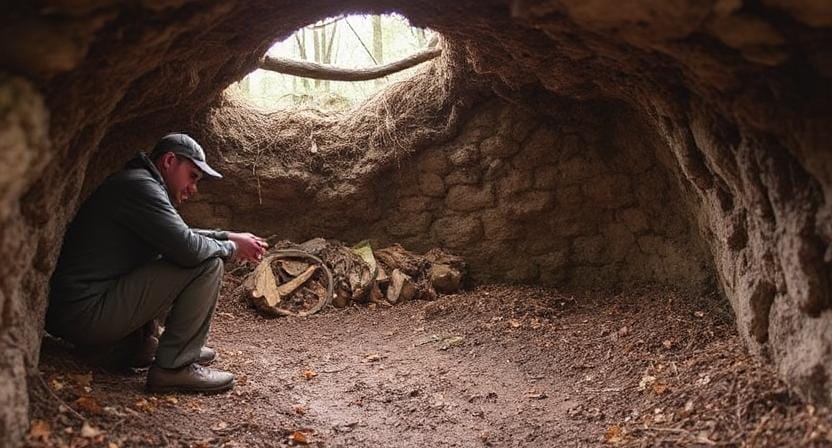
Making Plans for Your Root Cellar
It's time to plan the layout now that you've discovered the right spot (hopefully not too close to any annoying tree roots). The good news is that you don't need to be an architect or have elaborate blueprints; simple forms work best here.
A simple pit-style root cellar will work well. Just dig down around four feet (or whichever deep feels correct based on where the frost lines are). Remember that deeper isn't necessarily better unless you want to build an underground bunker!
Next is ventilation. This step is very important since stale air makes potatoes rotten faster than my kids can eat cookies at snack time. Put in some vent pipes made of PVC or metal tubing that go outdoors. These will assist maintain the humidity levels stable and move air around.
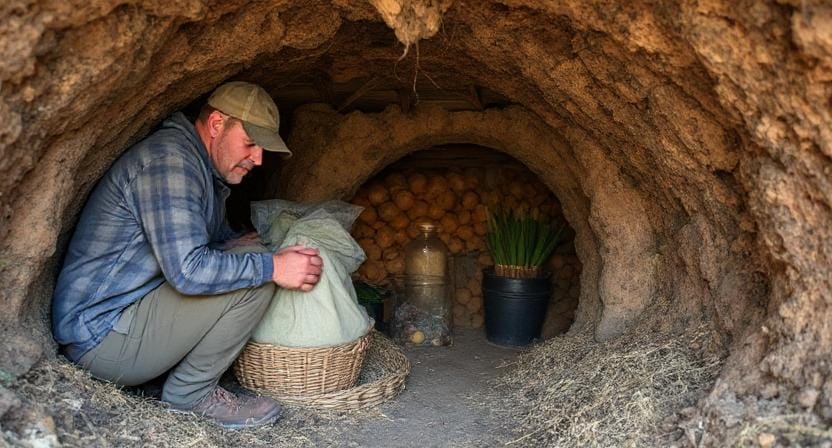
By the way, think about putting shelves inside! I once tried to stack my carrots in a messy way, but every time I opened the door, they did acrobatics, which was like a circus act!
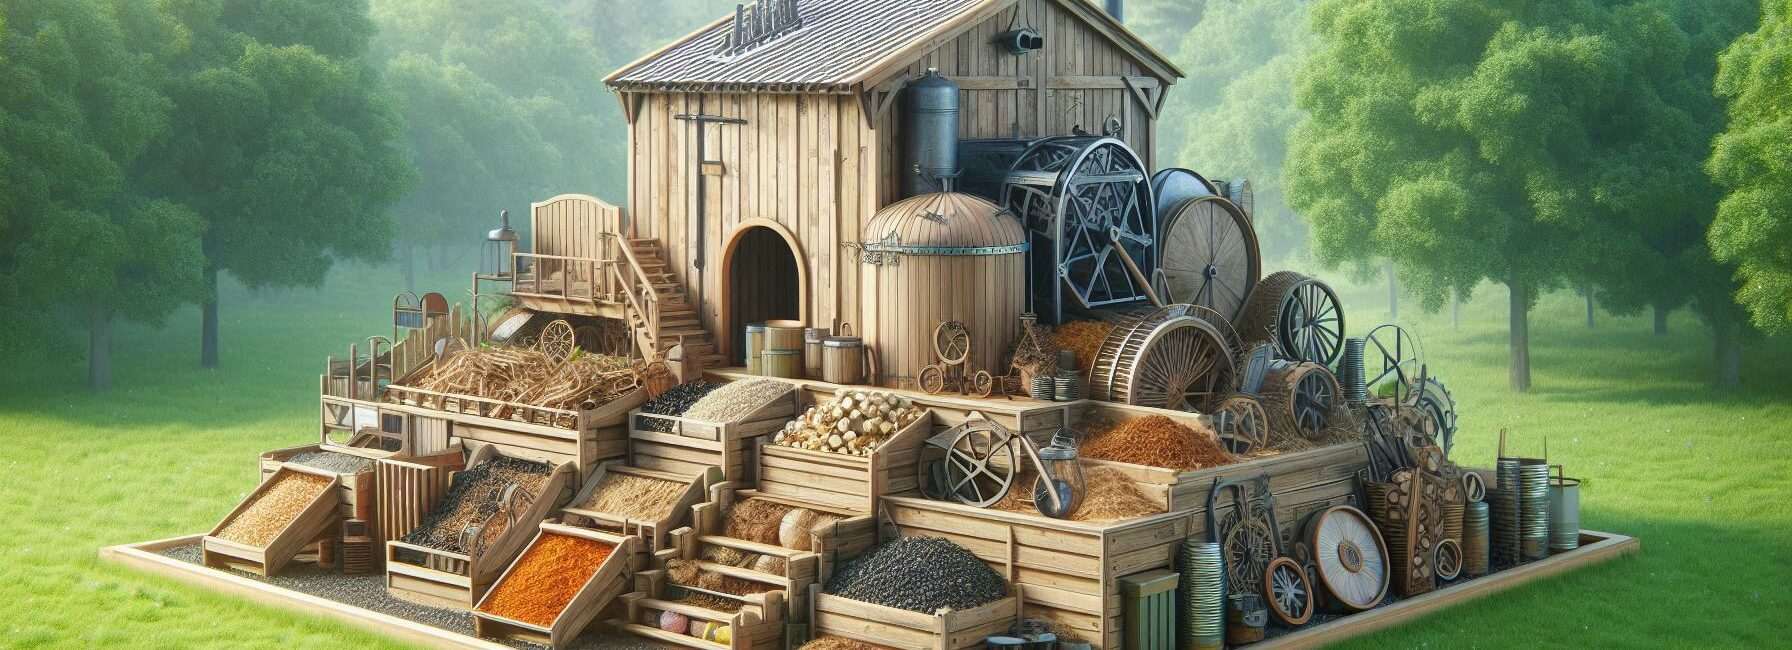
Things You Will Need to Build

Now that our design looks like a Pinterest board that has gone crazy, what materials do we really need? This is where things get interesting: you don't need marble worktops or gold-plated fixtures to build a root cellar; just some strong materials will do!
Concrete blocks are a popular choice for walls since they keep the heat in and are strong enough not to break under pressure (like when I try to do yoga). Wooden frames filled with straw bales are also great insulators, but they may need more care over time.
When it comes to roofing, think about using wood beams with dirt on top instead of regular roofing materials. It looks great with nature and doesn't stand out. If you live in a colder area, keep in mind that any roof type you choose must be able to handle snow loads.
Lastly, and I know this may seem apparent, but hear me out: you'll need a lot of shovels. And maybe someone who is willing to help dig while you carefully explain how vital this whole project is!
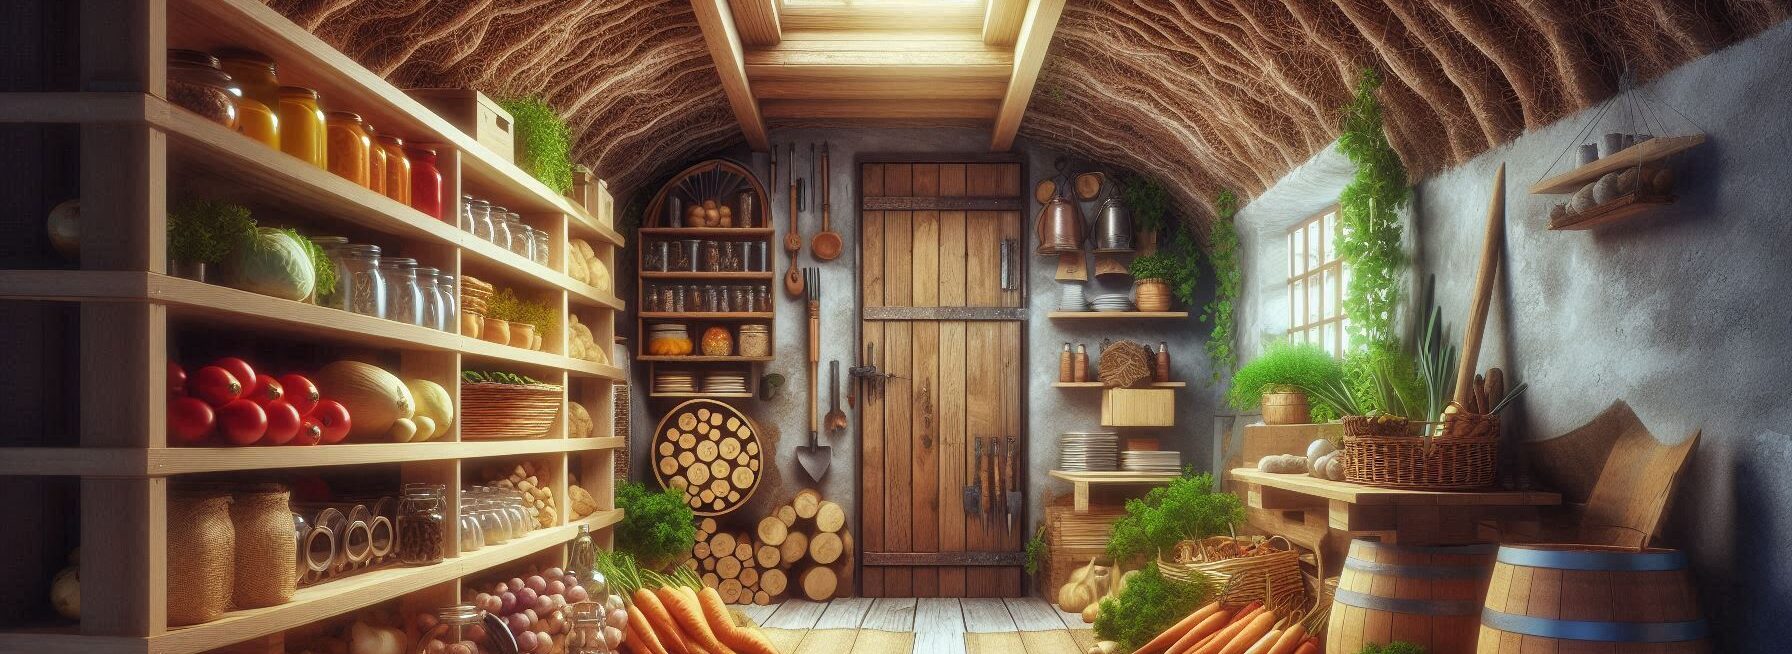
How to Store Your Harvest Like a Pro
You did a great job building your own root cellar! Now comes the fun part: putting all the tasty fruits and vegetables you've been fantasizing about since planting season started in the spring.
Don't wash fruits and vegetables before putting them inside; moisture makes them deteriorate faster than my cat chasing laser lasers. Instead, gently clean them before putting them on shelves cushioned with burlap bags or cardboard boxes. These will let air circulate through while keeping fragile skins from becoming bruised during shipping.
Everyone needs some space, including potatoes! Make sure everything has room to breathe. For the best long life:
– Apples stay fresh longer when they are kept away from other fruits and vegetables.
– Carrots should be damp but not too wet.
– Onions like to remain in the dark away from potatoes so they don't get mushy together!
By the way, I suggest checking for symptoms of spoiling often because no one wants to find out about something bad at dinner time unless it's cake. and even then, only rarely!
Tips for Keeping Things Working for a Long Time
Last but not least, we can't forget about upkeep! A little love and care will go a long way toward making sure our hard work pays off in the long run. Check the things you store every few weeks. If you find anything that has gone bad, throw it away right away so it doesn't ruin anyone else's day—or worse, the whole batch!
Also, keep an eye on temperature variations over the seasons. Ideally, you want it to stay consistently cool without big swings that could cause crops to go bad too soon (believe me, I learned this the hard way after one really hot summer!).
And if life throws you a curveball, like a storm that comes out of nowhere and floods the area, don't freak out! Just close up the entrances for a while till things calm down again. Even the best-laid plans may go wrong!
Just imagine having fresh veggies ready to go whenever you want. No more last-minute runs to the store. You can be your own chef, cooking up whatever you’re dreaming of!
Building one isn’t just for emergencies. It’s also a great way to keep your goodies fresh. Picture it: you’re making dinner, and there’s a potato right there, just waiting for you. And maybe some carrots. They’ve been hanging out in their little cool home, just waiting for the right moment.
Why do this? It’s fun! Digging and planning your space makes for a great weekend project. Plus, you’ll learn new things about storing food and how to keep it tasty. Pretty cool, right?
Think of this root cellar as a little life hack. You save money by growing your own food and skipping those overpriced grocery runs. You’ll feel proud, too. That’s something to brag about over coffee, isn’t it?
So, picture you in your kitchen, reaching for a fresh veggie anytime, any day. A little space can bring so much joy. Let’s make those culinary masterpieces happen, one potato at a time. Enjoy the journey!
Frequently Asked Questions
Why should a root cellar be built in a shaded location?
A shaded position reduces heat gain from direct sunlight, helping maintain more stable temperatures inside the cellar.
How deep should the root cellar be?
It should be dug below the frost line to prevent stored produce from freezing during colder months.
What materials work best for insulation?
Earth, hay, and straw naturally stabilize temperature by reducing heat fluctuation and improving humidity control.
Why is ventilation important?
Ventilation reduces humidity buildup, prevents condensation, and helps discourage mold and rot from affecting stored produce.
What building materials are recommended for walls?
Stone, brick, and concrete blocks provide structural strength and resist moisture better than untreated wood.
Can all produce be stored together?
No. Some items like apples release ethylene gas that can speed ripening and spoilage of other vegetables.
How often should a root cellar be checked?
Inspect periodically for mold, pests, and softening produce so problems can be removed before they spread.
Suggested Resources:
Root Cellars: How To Make One
https://www.motherearthnews.com/organic-gardening/root-cellars-how-to-make-one-zm0z20jjzmar
Building Your Own Root Cellar
https://www.thegrownetwork.com/building-your-own-root-cellar/
The Complete Guide to Root Cellars
https://www.backwoodshome.com/the-complete-guide-to-root-cellars/

Kevin Collier is a seasoned survivalist and expert in prepping and homesteading, contributing to WiseSurvive.com. With a deep-rooted passion for self-sufficiency and outdoor survival skills, Kevin shares practical advice, strategies, and resources to help individuals prepare for any challenge. His informative articles cover a range of topics, from essential survival techniques to sustainable living practices, empowering readers to thrive in any situation. Whether you're a novice or a seasoned prepper, Kevin's insights will inspire you to take charge of your readiness and build resilience for the future.